Patch from Scratch – update by Kate Duncan
If you are at the beach this summer collect some seaweed for your vege garden. It’s like steroids for vegetables. Before you go anywhere though get your climbing beans planted. You’ll need to give them something to climb up so scroll down for step by step guides to build two classic structures. Christmas is all about love and peace so in order to keep this newsletter a battle free zone we pay homage to a good bug – the worm. But is a worm even a bug? Hey, it’s Christmas, so we don’t want worms to feel left out do we?
And here is a great healthy tip: if you have an abundance of leafy greens in your vege patch and can’t see yourself munching your way through them Renata, From Grey to Green, has the right idea… make green smoothies! Whizz up a bunch of green leaves, a banana, a kiwifruit and some extra water in your blender to make a smoothie for breakfast that is jam packed with nutrients. If you are interested in learning more of Renata’s raw food recipes and the healing power of eating raw food go to one of her demonstration classes. www.fromgreytogreen.co.nz
Seaweed
Seaweed is a super food for us and our vegetable gardens! It has a broad and balanced range of nutrients for all your plants. Feed them seaweed and they’ll grow more flowers, more fruit and more roots which means they’ll suck up more nutrients. Seaweed makes plants stronger with thicker cell walls making them less likely to be attacked by sucking insects or fungal infections. Seaweed contains natural plant hormones which seedlings love because it reduces the shock when they’re transplanted. And because seaweed breaks down quickly it will fire your compost heap into action. Sea weed spray can be absorbed through leaves and it’s easy to make. Soak seaweed in a bucket of water for a week, strain the liquid into a sprayer, and throw the goop on the compost. Alternatively, use seaweed as nutritious mulch on your vegetable patch to keep the weeds out and the water in.
Put seaweed on your compost, use it as mulch, brew some fertilizer or do all three. Whatever you do don’t deny your vegetables the magic of seaweed, but do wash the salt off first so you don’t scare off your worm friends.
Bean frames
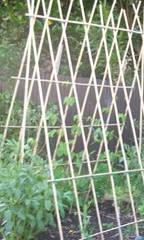
If you haven’t done it already, planting climbing beans will be on top of your gardening to do list. Here are some instructions on how to build the best structures for your beans to climb up. It’s not too tricky or expensive either, especially if you have access to bamboo or other suitable branches. Use bamboo to make an A frame anywhere in your vege patch or use posts and wire if you want to make a permanent climbing structure against a fence. Assemble the bamboo frames before planting so you don’t damage the roots of your beans. And make sure your frame is sturdy… those tiny beans will grow into monsters and you don’t want your frame going lopsided under the weight. Here’s how to do it:
The A Frame
1. Make 2 lines in the soil 30cm apart.
2. Push vertical bamboo stakes into the ground along the lines directly opposite one another.
3. Where the stakes cross at the top, put a horizontal wood, secure with old stockings cut into strips.
4. Attach bamboo stakes horizontally across the frame up both sides, or you can make a big X on either side if you’re running short of stakes.
5. Plant a climbing bean seed or seedling at the bottom of each vertical stake on the outside.
6. If the beans are not clinging to the stakes as they grow then train with a little cut up stocking tied around the bean and bamboo.
Post and Wire Row
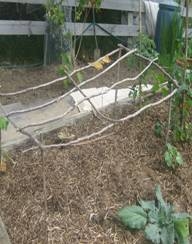
You can use either wire or string for this. Support the string either against a wooden fence as in the picture below or put posts in the ground and wind or staple the string/wire to them.
1. Secure posts into the ground 40cm apart.
2. Tie wire or string horizontally between the posts 10cm above ground level. Wind it around each post then continue onto the next post.
3. Tie the next wire or string 20cm higher up and repeat until you reach the top of the posts.
4. Plant climbing bean seeds or seedlings underneath the lowest wire.
Dwarf Bean Structure
1. Decide on the length of the frame you need and cut 4 pieces of wood to this size.
2. Lay the 4 long pieces of wood on the ground or a flat surface, spaced 25cm apart.
3. Measure 3 lengths of wood to 75cm and place them across the ends and the middle of the frame then securely tie the top part of the frame together.
4. Cut 4 lengths of wood to 40cm for the corner uprights. Place the top of the frame on the ground where you are planting your dwarf beans to guide you pushing in the corner uprights. Push all 4 corners pieces of wood halfway into the ground so they are the same height as each other – 20cm above and below the soil.
5. Hold the top part of the frame in place and level while you firmly tie the corners together. You may need an extra pair of hands here.
6. Position beans so they will grow up through the rectangular gaps and you can flop them over the frame once they begin to fruit and get heavy. Plant them 10 to 15 cm apart. Depending on the length of your frame you will have a few plants growing through each of the six rectangles in the frame.
Earthworms
Worms play a huge role in maintaining healthy soil. They tunnel through the soil leaving a trail of slime that dries and binds the soil, improving the soil structure and leaving space for air and water to flow through. They eat organic matter like rotting leaves pulling them down from the surface, carrying it under the soil in their bellies then excreting beautiful pooh, worm castings or rich humus, whatever you prefer to call it, full of nutrients for your plants to absorb, continuing the cycle of fertility in your vegetable patch.
Worms will flourish in your garden if you have nice soil, so it’s a bit of a chicken and egg situation. Ideal soil is made up of 25% air, 25% water, 45% mineral and 5% organic matter so by adding compost, pea straw and water and not walking on you vegetable garden which compacts the soil, you are making a happy place for worms. Which means the worms will come along and make your soil even better.
But here’s a warning: don’t go tipping your worm farm worms into your vegetable garden! The worms in your vegetable garden are different to the composting worms in your worm farm. Worm farm worms need a lot more food and they would soon go hungry and die.
What to plant in December:
Beetroot Broccoli Carrot Capsicum Celery Climbing beans Cucumber Dwarf beans Eggplant Globe artichoke Lettuce Leeks Kumara Parsnip Pepper Potato Pumpkin Radish Rhubarb Rockmelon Silverbeet Spinach Spring onion Squash Swede Sweetcorn Tomato Turnip Watermelon Yams Zucchini
If you want to grow your own veges and could do with a helping hand to get the right start, then you may want to seek help. Patch from Scratch offers an all inclusive service building vege beds for beginner organic gardeners and busy people and helping you to get up and growing. We also offer Kits sets for DIY enthusiasts and a consultancy service for people who really want to do it all themselves but just need a bit of guidance. For more on our services go to www.patchfromscratch.co.nz or call us for details 09 525 7897 / 021 334 603.


